3. Computer controlled cutting
This week, I completed assignments focused on laser cutting and design, which included both individual and group tasks.
Laser cutters
Laser cutting machines are advanced tools that utilize focused laser beams to cut, engrave, or etch materials with precision. They are widely used in various industries, including manufacturing, automotive, aerospace, and arts and crafts.
Types of Laser Cutters:
CO2 Lasers: Ideal for cutting non-metal materials such as wood, acrylic, and plastic.
Fiber Lasers: Known for their efficiency and precision, making them suitable for cutting metals like steel, aluminum, and brass.
Nd Lasers: Mainly utilized for engraving and marking on metals and plastics.
Suitable Speed and Power Settings
The speed and power settings of a laser cutter are essential for obtaining best results. These settings depend on the type of material being used and the desired effect.
-
Speed: This refers to the rate at which the laser head moves. Higher speeds are ideal for engraving, while lower speeds are more effective for cutting.
-
Power: This indicates the intensity of the laser beam. Thicker materials require higher power, whereas lower power is adequate for thinner materials or engraving tasks.
Key Considerations
-
Material Type: Different materials need specific settings; for example, cutting acrylic requires different adjustments compared to cutting wood.
-
Material Thickness: Thicker materials need more power and slower cutting speeds.
-
Desired Finish: Engraving usually involves higher speeds with lower power, whereas cutting typically requires lower speeds and higher power.
-
Focal Point: Adjusting the laser’s focal point is vital for achieving clean, precise cuts. This focal point is where the laser beam is most concentrated, and ensuring it is accurately set improves both cutting quality and efficiency.
Group assignment
We create a website to determine the optimal speed and power settings for cutting 2mm cardboard. To see the details: click to visit website
Individual assignment: Press Fit Design
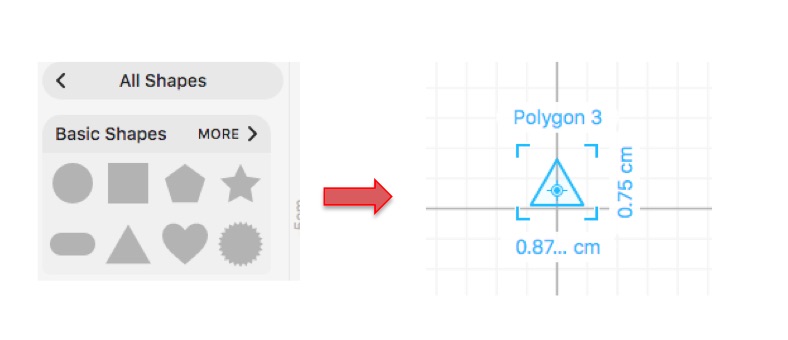
The task was to design a unique press-fit shape that could be assembled in different ways. However, I initially misinterpreted the instructions and began creating a triangle using the cuttle.xyz software.
1. Creating the Design in cuttle.xyz:
- I start by dragging a triangle shape and resizing it.
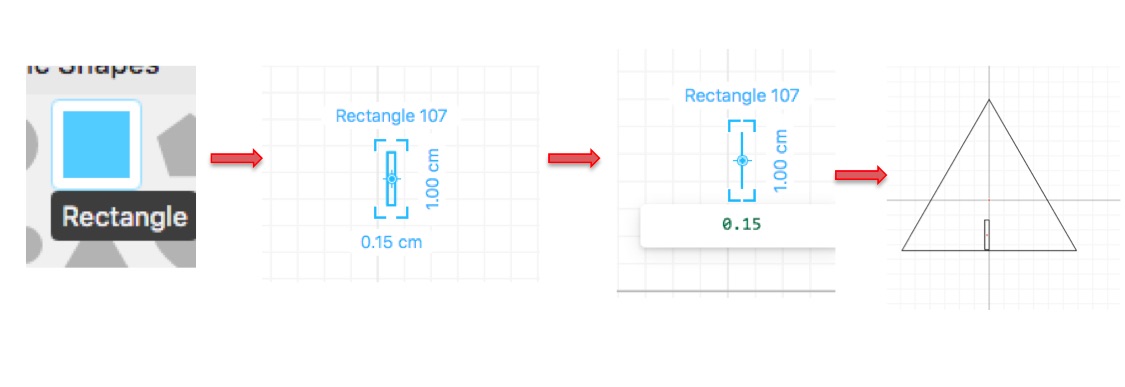
 - Next, I drag a rectangle shape, resize it, and then duplicate it.
- I position one of the rectangles at the bottom center.
- Next, I drag a rectangle shape, resize it, and then duplicate it.
- I position one of the rectangles at the bottom center.
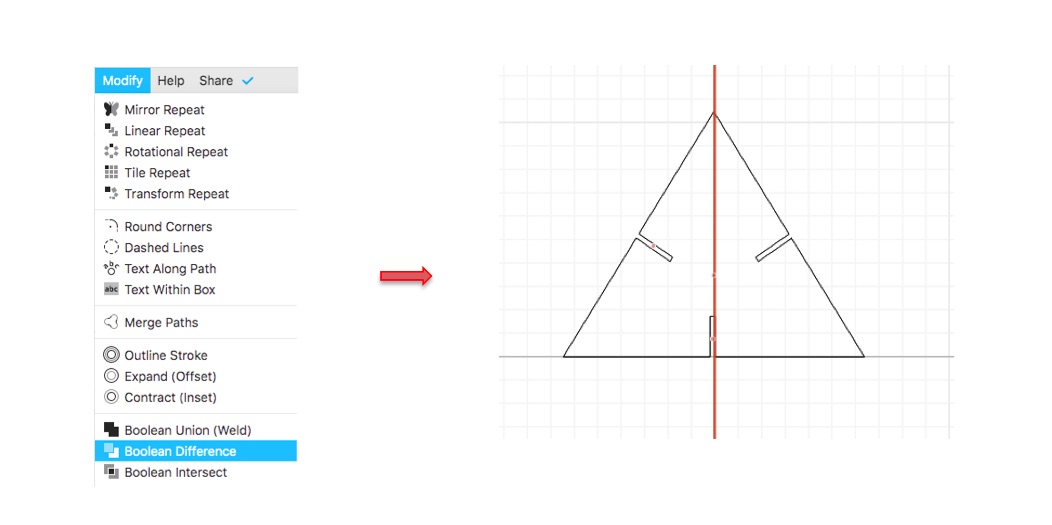
- For the other rectangle, I select it, click on “modify” in the toolbar, then choose the “mirror repeat” option, and adjust its position.

-
Finally, I select all the triangles and use the “boolean difference” tool to create joints in the triangle.
-
I export the final shape and saved as a DXF file for the laser cutter to accept.
2. Cutting and assembling the parts:
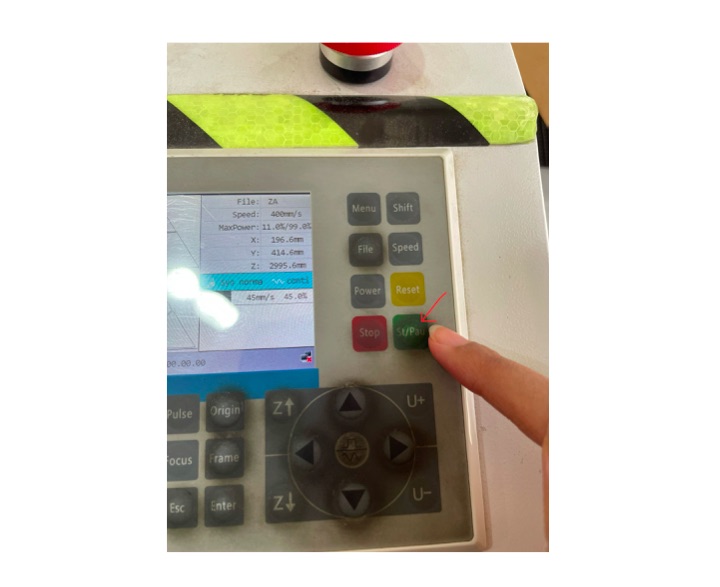
- First, I turn on the laser cutter by pressing the start button.
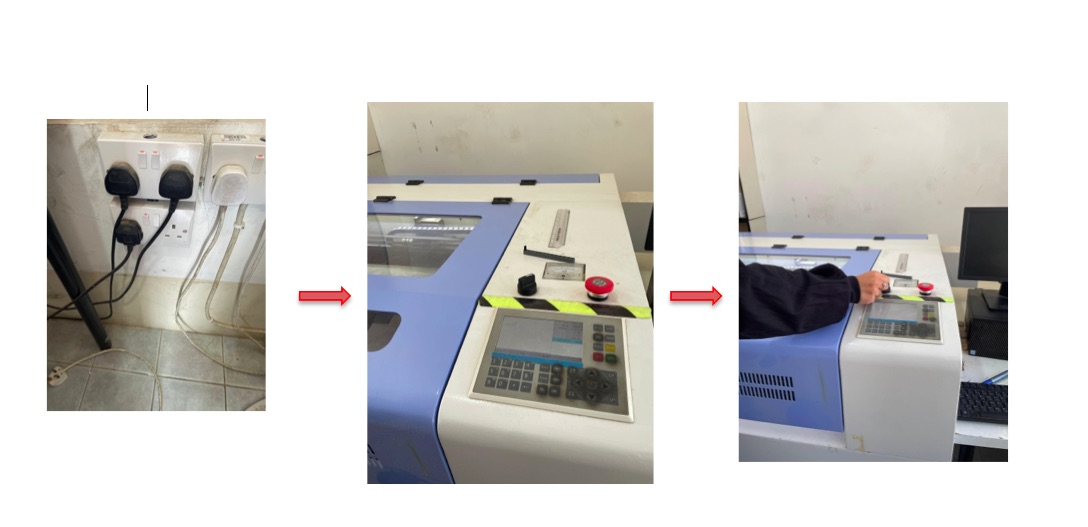
-
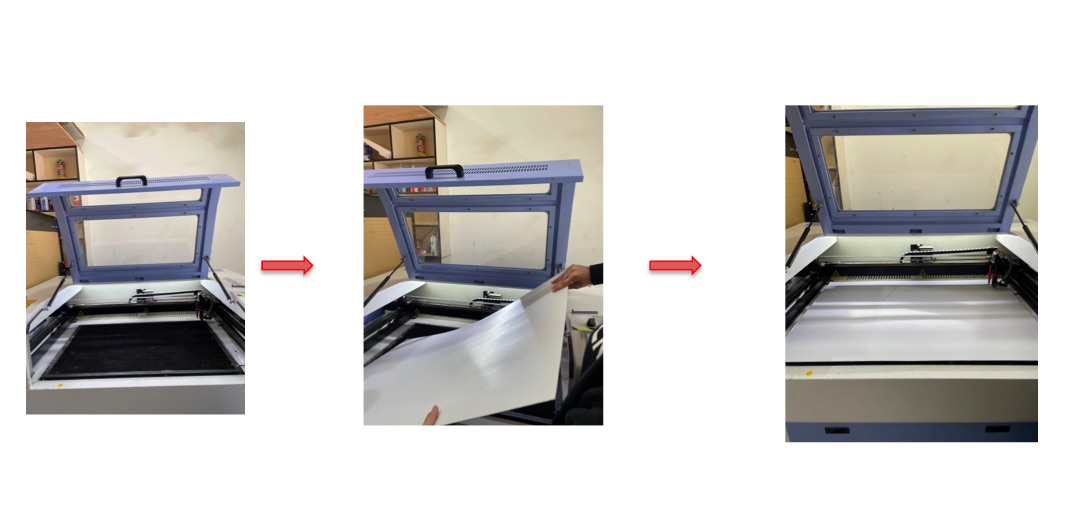
I open the handle to place the cardboard on the machine bed.
-
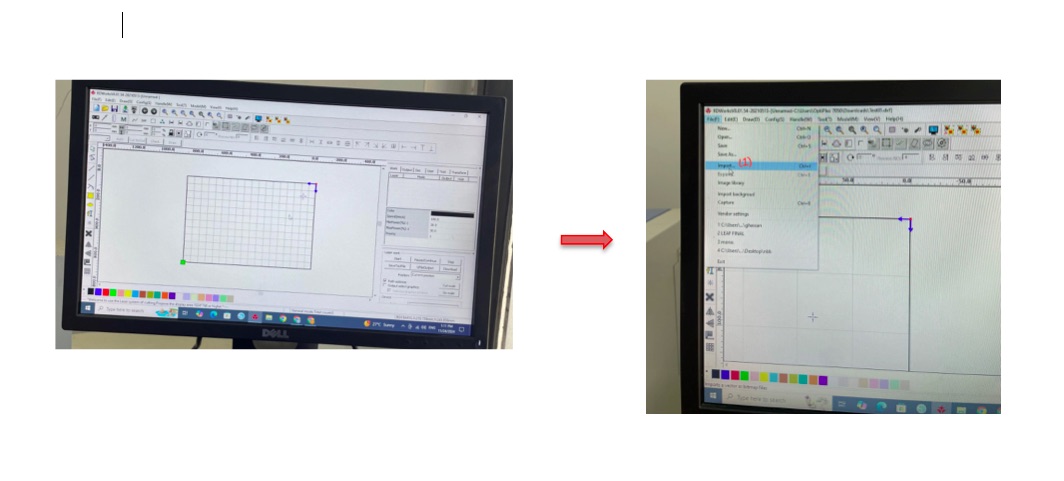
I launch the ‘RDWorks’ software to import my design.
-
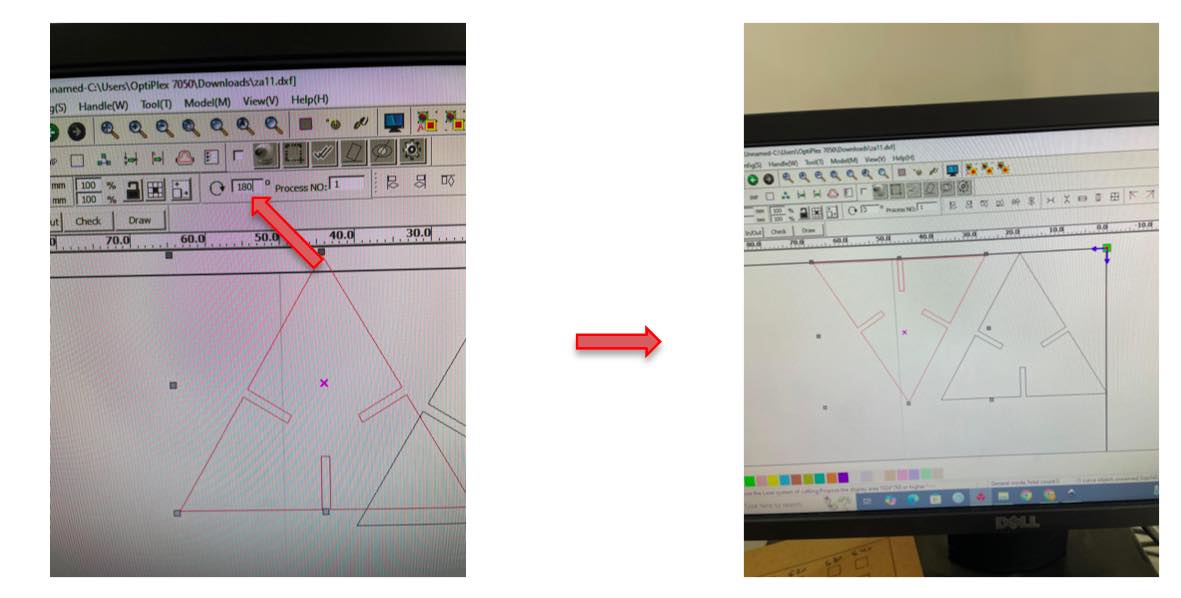
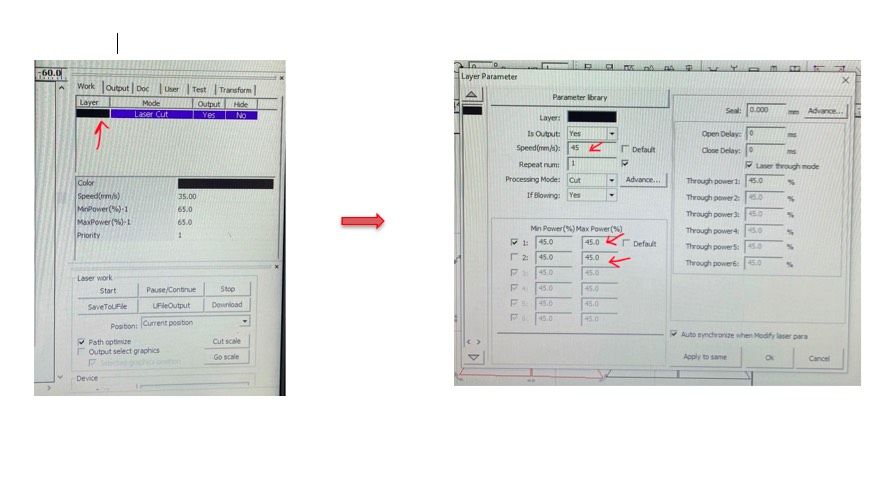
I create a duplicate of the design, rotate it 180 degrees, and adjust the speed and power by pressing the “parametric library” button.
-
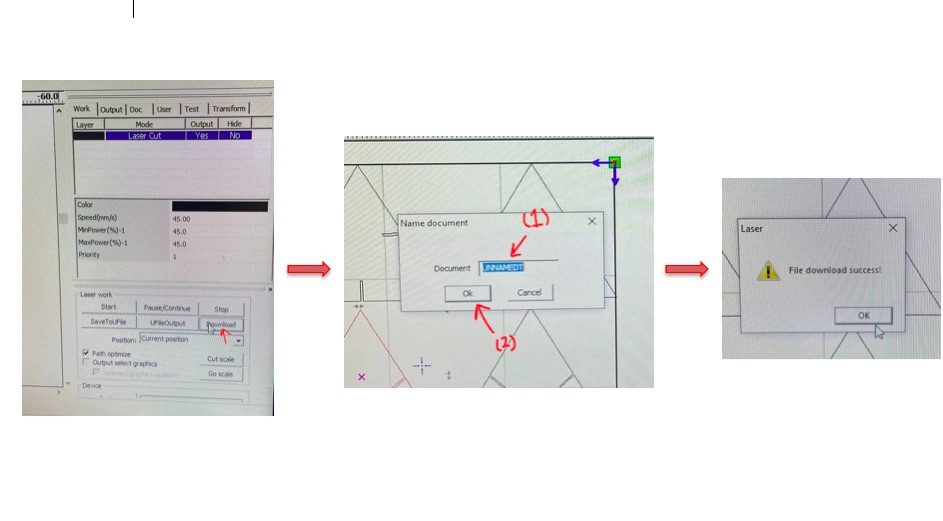
I download the design to the machine.
-
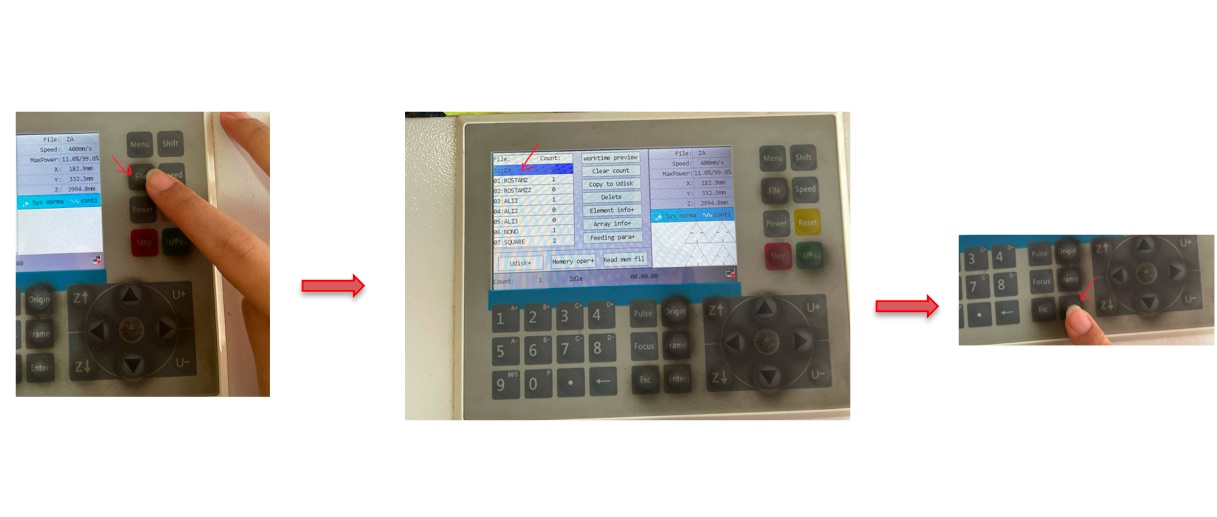
I click the file button, select the appropriate file, and then press the enter button.
-
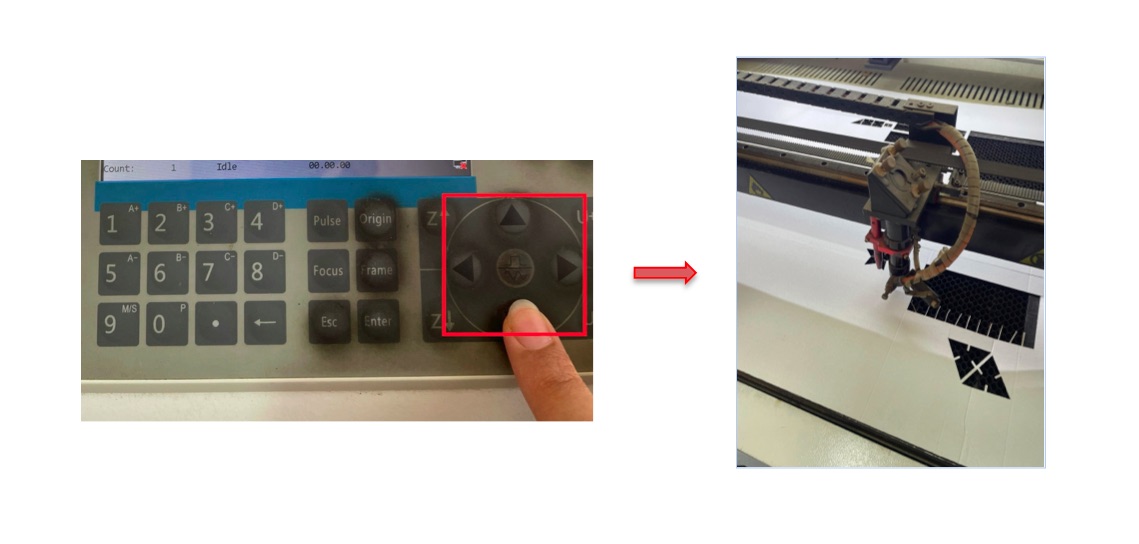
I use the arrows to adjust the laser beam and position it in an empty area for cutting.
-
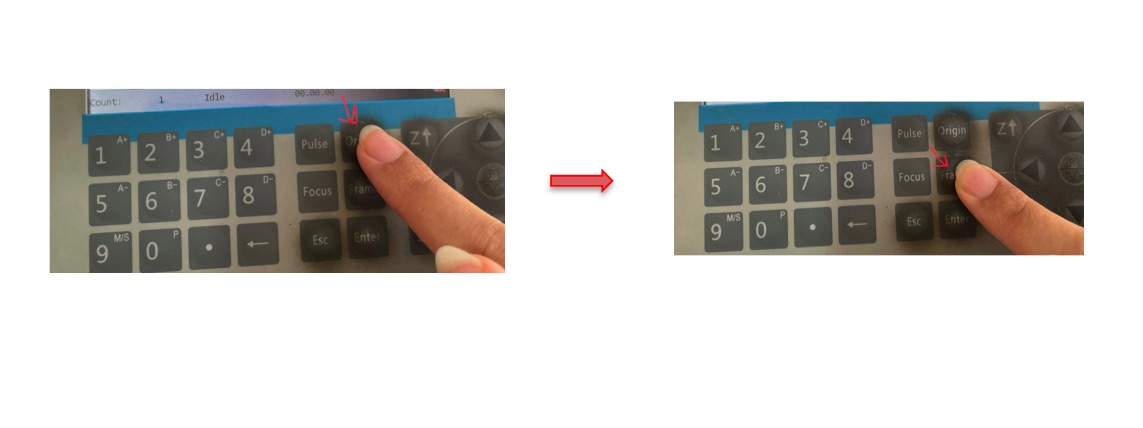
I click the origin button then frame button to check the cutting area .
-
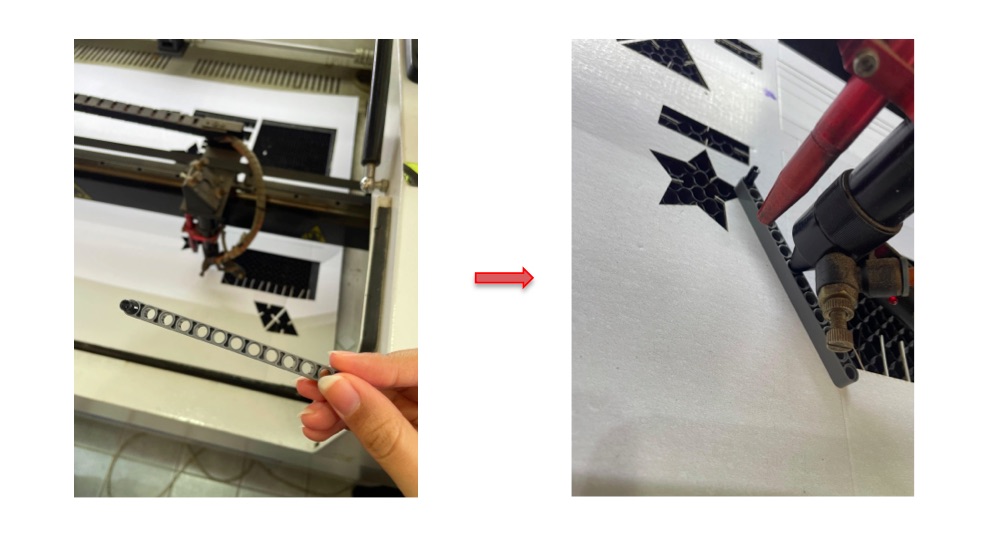
A Lego piece is used to accurately set the height by placing a finger on its back to locate the laser’s focal point.
-
I press the start button to begin cutting.
-
The speed and power settings were fine, but I encountered a problem when assembling the shapes: the joints didn’t fit properly, as sometimes the width was too large and other times too small. I adjusted the joint sizes and tested them again to determine the correct dimensions before cutting multiple pieces.

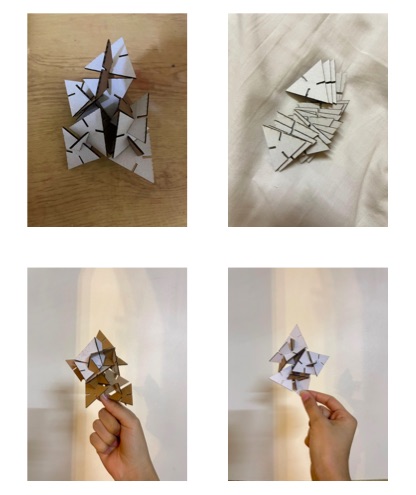
- Once I found the appropriate measurements, I cut 20 pieces and assembled them into various shapes.
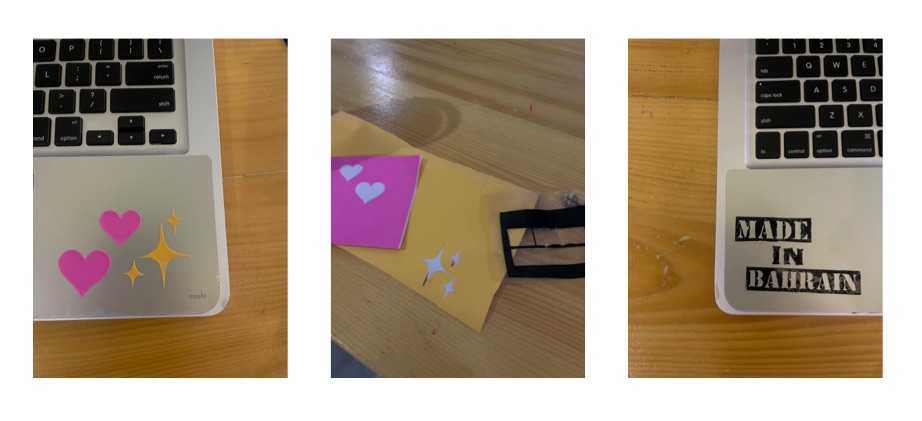
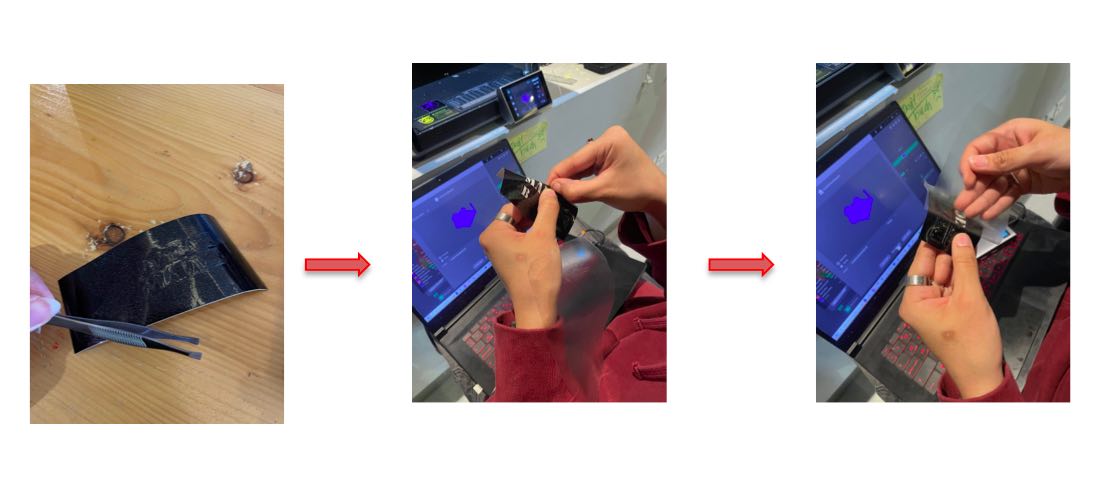
Individual Assignment: Sticker Design in Silhouette Studio
-
I visit the Silhouette Studio website to download the software.
-
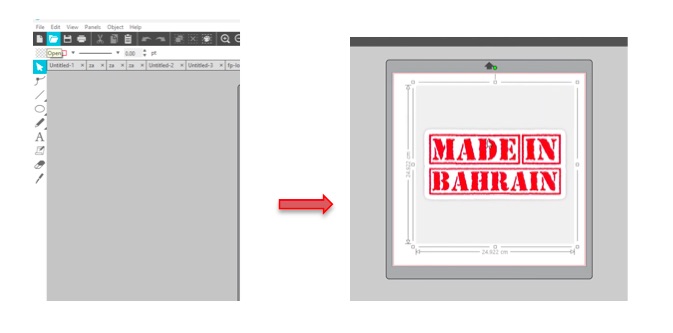
I select an external design in PNG format and import it into Silhouette Studio.
-
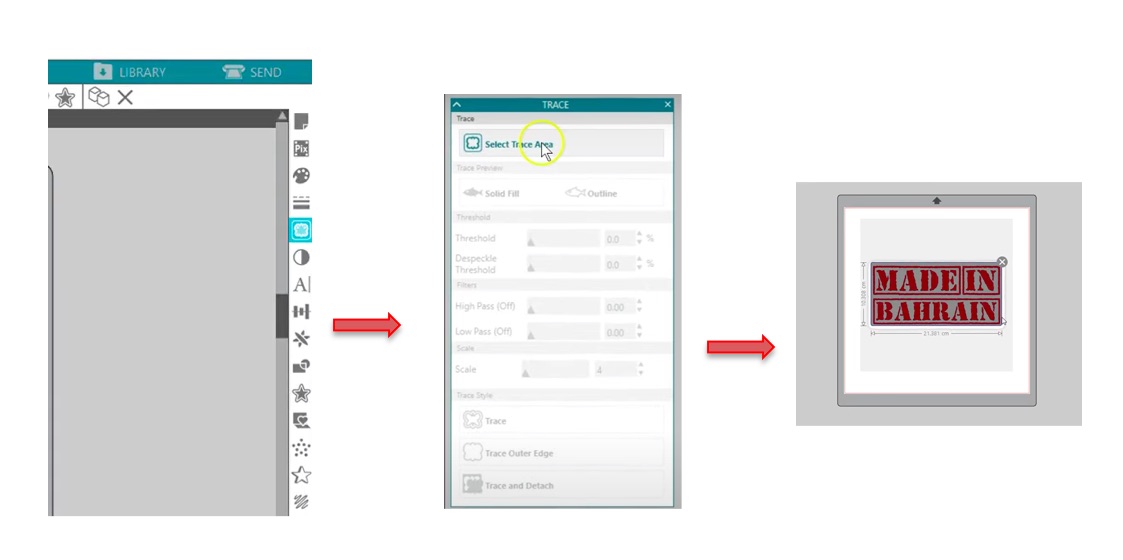
I open the trace panel, select the trace area, and trace the image before deleting the original.

-
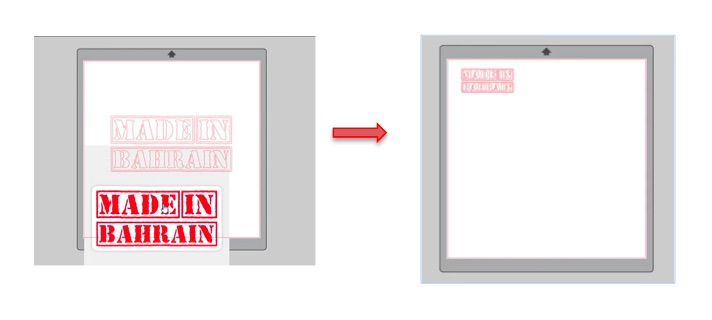
I align the traced image to the corner of the canvas.
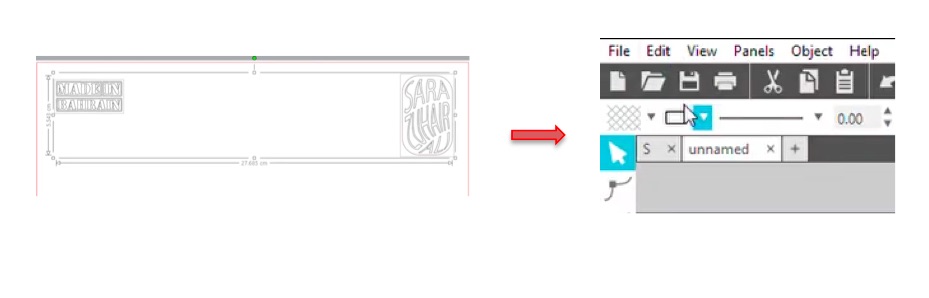
- I selected both shapes and colored them the same by using the shape shown below.
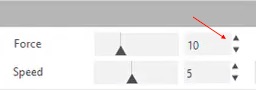
- I click on ‘Send’ and adjust the force and speed settings to ensure the sticker cuts easily.
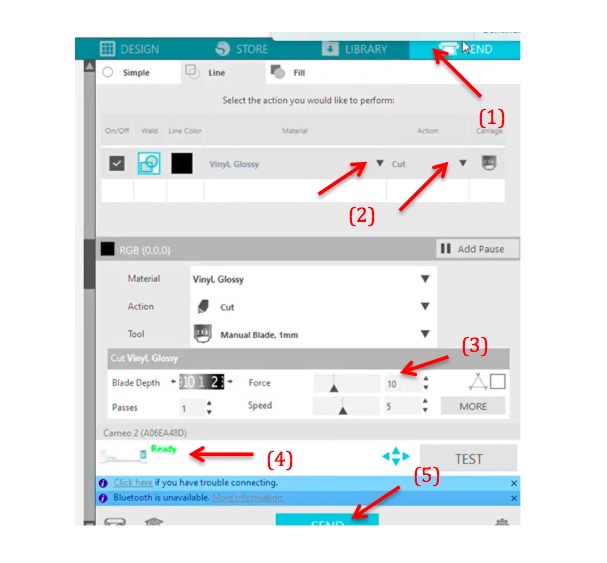
preparing for printing:
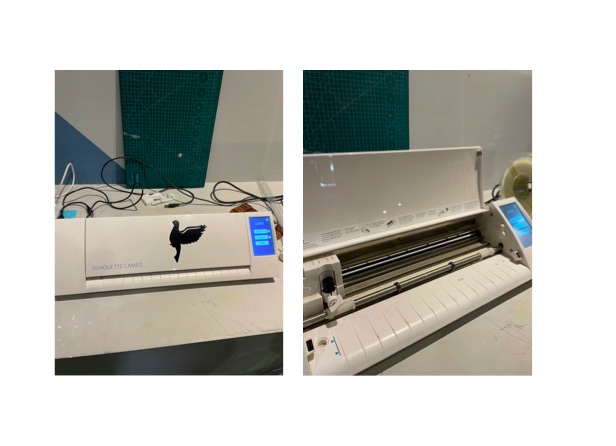
By using “Silhouette Cameo” machine to print out my sticker:
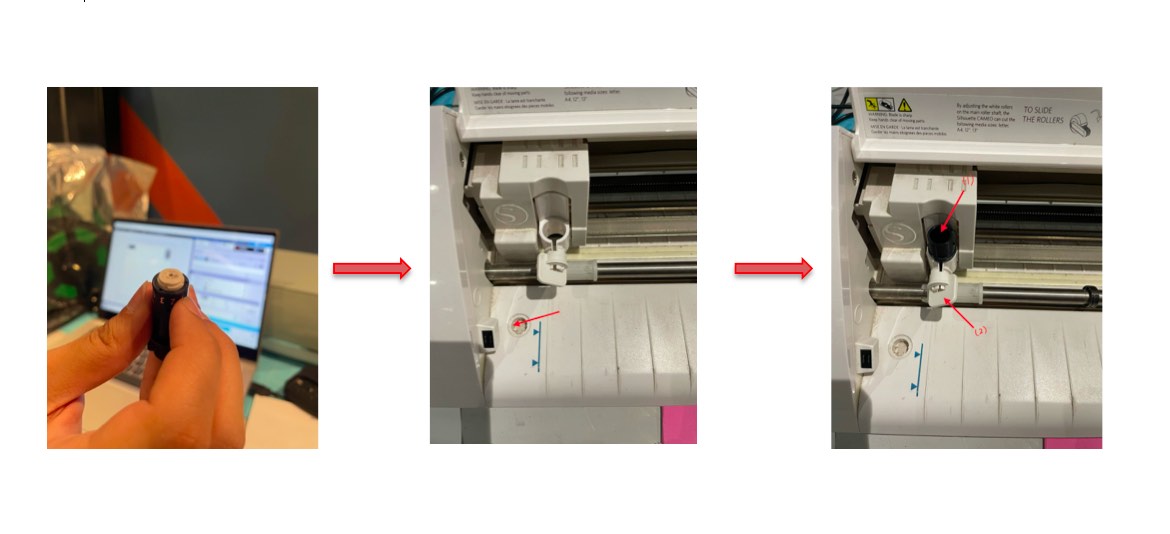
- I adjust the blade depth by inserting the blade into the designated hole below and rotating it according to the material I’m using. Once set, I place it back in its correct position and secure it.
-
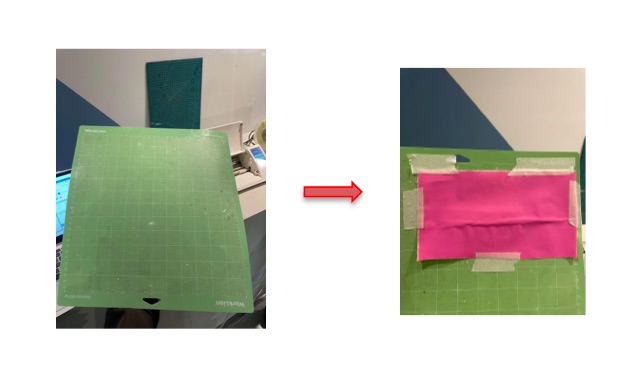
I place the sticker sheet on the cutting mat and secure it with tape to prevent any unintended movements that could affect the precision of my cuts.
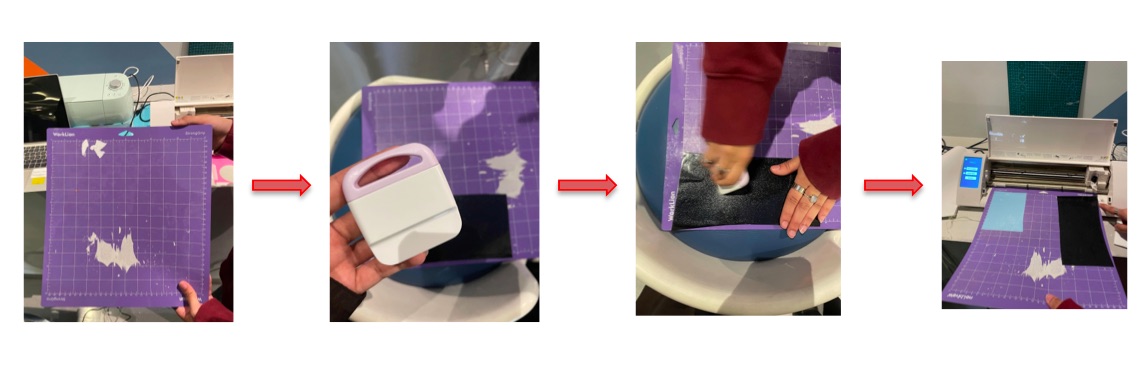
-
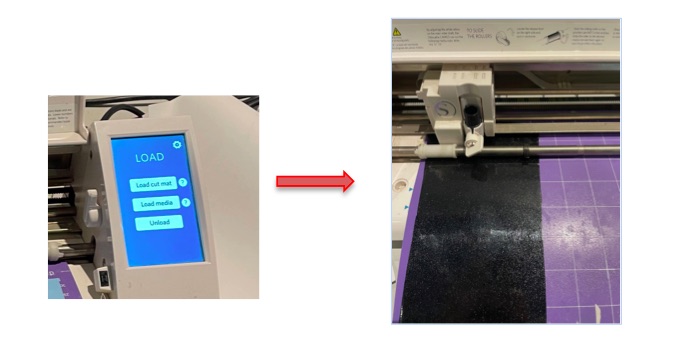
I press “load cut mat” to hold the machine the mat, making sure everything is aligned properly and ready for cutting.
-
I click “send” to start the cutting process.
-
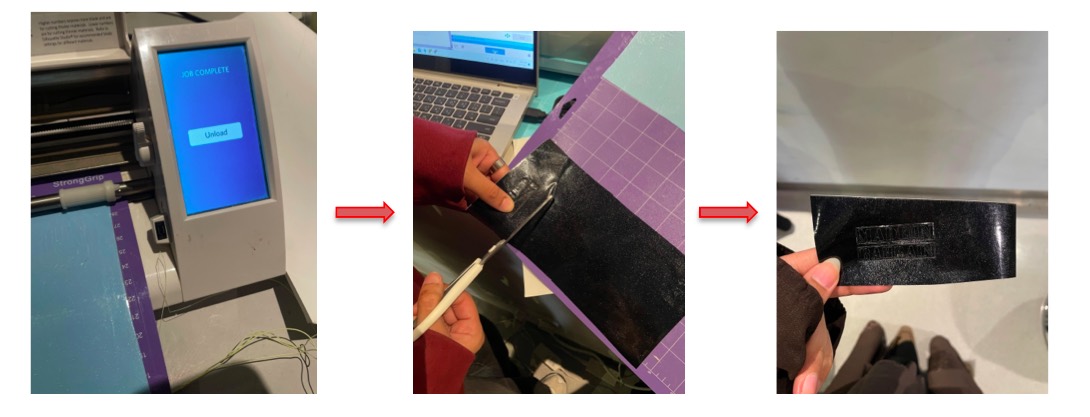
After cutting, I click “unload” to release the mat, making it easier to remove the sticker from the machine.
- Next, I cut out the area around my sticker.
-
I encountered an issue with the initial cut; the force wasn’t strong enough, making it hard to remove the stickers. So, I increased the force setting and made a second cut.
-
I used a transparent sticker to cover my design, removing any unwanted space before sticking it on my laptop.
- In the end, I successfully created three different sticker designs.